The Ultimate Guide to Seamless 9-Grid Image Slicing for Social Media Feeds
Why the Seamless 9-Grid Layout Dominates Feeds
In today's fast-paced social media environment, visual feeds move in milliseconds. The average user spends less than 1.5 seconds reviewing a single post on their screen. In this hyper-visual era, standard text updates or plain single images struggle to compete. This is where seamless nine-grid image slicing (3x3 Grid Slicing) becomes a powerful growth hack.
Seamless 9-grid slicing involves taking a single high-resolution panoramic photo, graphic, or digital poster, and dividing it into 9 square sub-images in a 3×3 grid. When posted on platform feeds like WeChat Moments, Instagram, or Xiaohongshu, these 9 images align perfectly on the user's screen to form one massive, cohesive banner.
This technique is exceptionally effective for three reasons:
1. Maximized Screen Viewport: A 9-grid layout occupies more than 60% of the mobile screen area, naturally standing out compared to small single thumbnails.
2. Curiosity Clicks: Cohesive splits hint at rich details. Users are much more likely to click on individual grids to zoom in or swipe through the gallery, increasing their dwell time.
3. Professional Aesthetics: A seamless grid mimics magazine-style layouts, separating your content from generic posts and boosting your professional brand presence.
Visual Psychology and the Rules of Grid Composition
Creating a successful 9-grid split requires careful planning. If the main subject of your photo falls directly on a cutting line, the layout will look awkward and broken. Use these composition guidelines to prepare your grids:
#### 1. The Intersection of Gridlines and the Rule of Thirds
The gridlines of a 3×3 slice layout naturally match the classic "Rule of Thirds" in photography.
- Focal Points: The four intersections of the gridlines are where human eyes focus first. Place key elements—like portraits, buildings, or core text—on or near these intersections.
- Avoid Split Features: Ensure human faces, eyes, and critical headlines do not lie directly on the red cutting guidelines. Otherwise, when viewed individually, the face will look split and disjointed.
#### 2. Central Focus & Surrounding Context
In a nine-grid layout, the 5th slot (the absolute center) is the ultimate focal point.
- The Center Star (Grid 5): Always place your most critical subject in the middle square. For a travel collage, place the main portrait in the 5th square, and surrounding elements (sky, beach, food, and gear) in the remaining slots.
- Contextual Framing: Use the surrounding 8 squares to frame the center, utilizing depth of field (blurring secondary elements) to guide the viewer's eye back to the middle.
Technical Dimensions for Key Social Platforms
Different social media platforms handle thumbnails and resizing differently. If you ignore these parameters, your grids may compress, stretch, or warp:
1. WeChat Moments
- Mechanism: WeChat grids display thumbnails in fixed 1:1 squares, with a tiny white separator gap of roughly 3px-4px.
- Best Ratio: Ensure your source canvas is a perfect 1:1 square. If you have a wide panoramic image, crop it to 1:1 using a editor first.
- Resolution: We recommend slicing each sub-image at 800 × 800 pixels to 1200 × 1200 pixels. Resolutions too low look blurry on modern screens, while files too large trigger aggressive image compression by WeChat servers.
2. Red (Xiaohongshu)
- Mechanism: Xiaohongshu feeds default to vertical 3:4 aspect ratios or square 1:1 layouts.
- Best Practices:博主 frequently upload 9-grid layouts as their cover banner or as the secondary slide in photo sliders.
- Resolution: Export slices at 1080 × 1080 pixels for clean, pixel-perfect presentation.
3. Weibo & Twitter
- Mechanism: Grids are displayed in a 3×3 format on mobile devices.
- Resolution: These platforms handle high-res files well. Use 1200 × 1200 pixels to retain fine details.
Step-by-Step Guide: Slicing with WoollyPix Smart Slice
With the WoollyPix Smart Slice client-side tool, you can crop, split, and package your grids directly in your web browser. No complex software installations, no server uploads.
Here is the step-by-step tutorial:
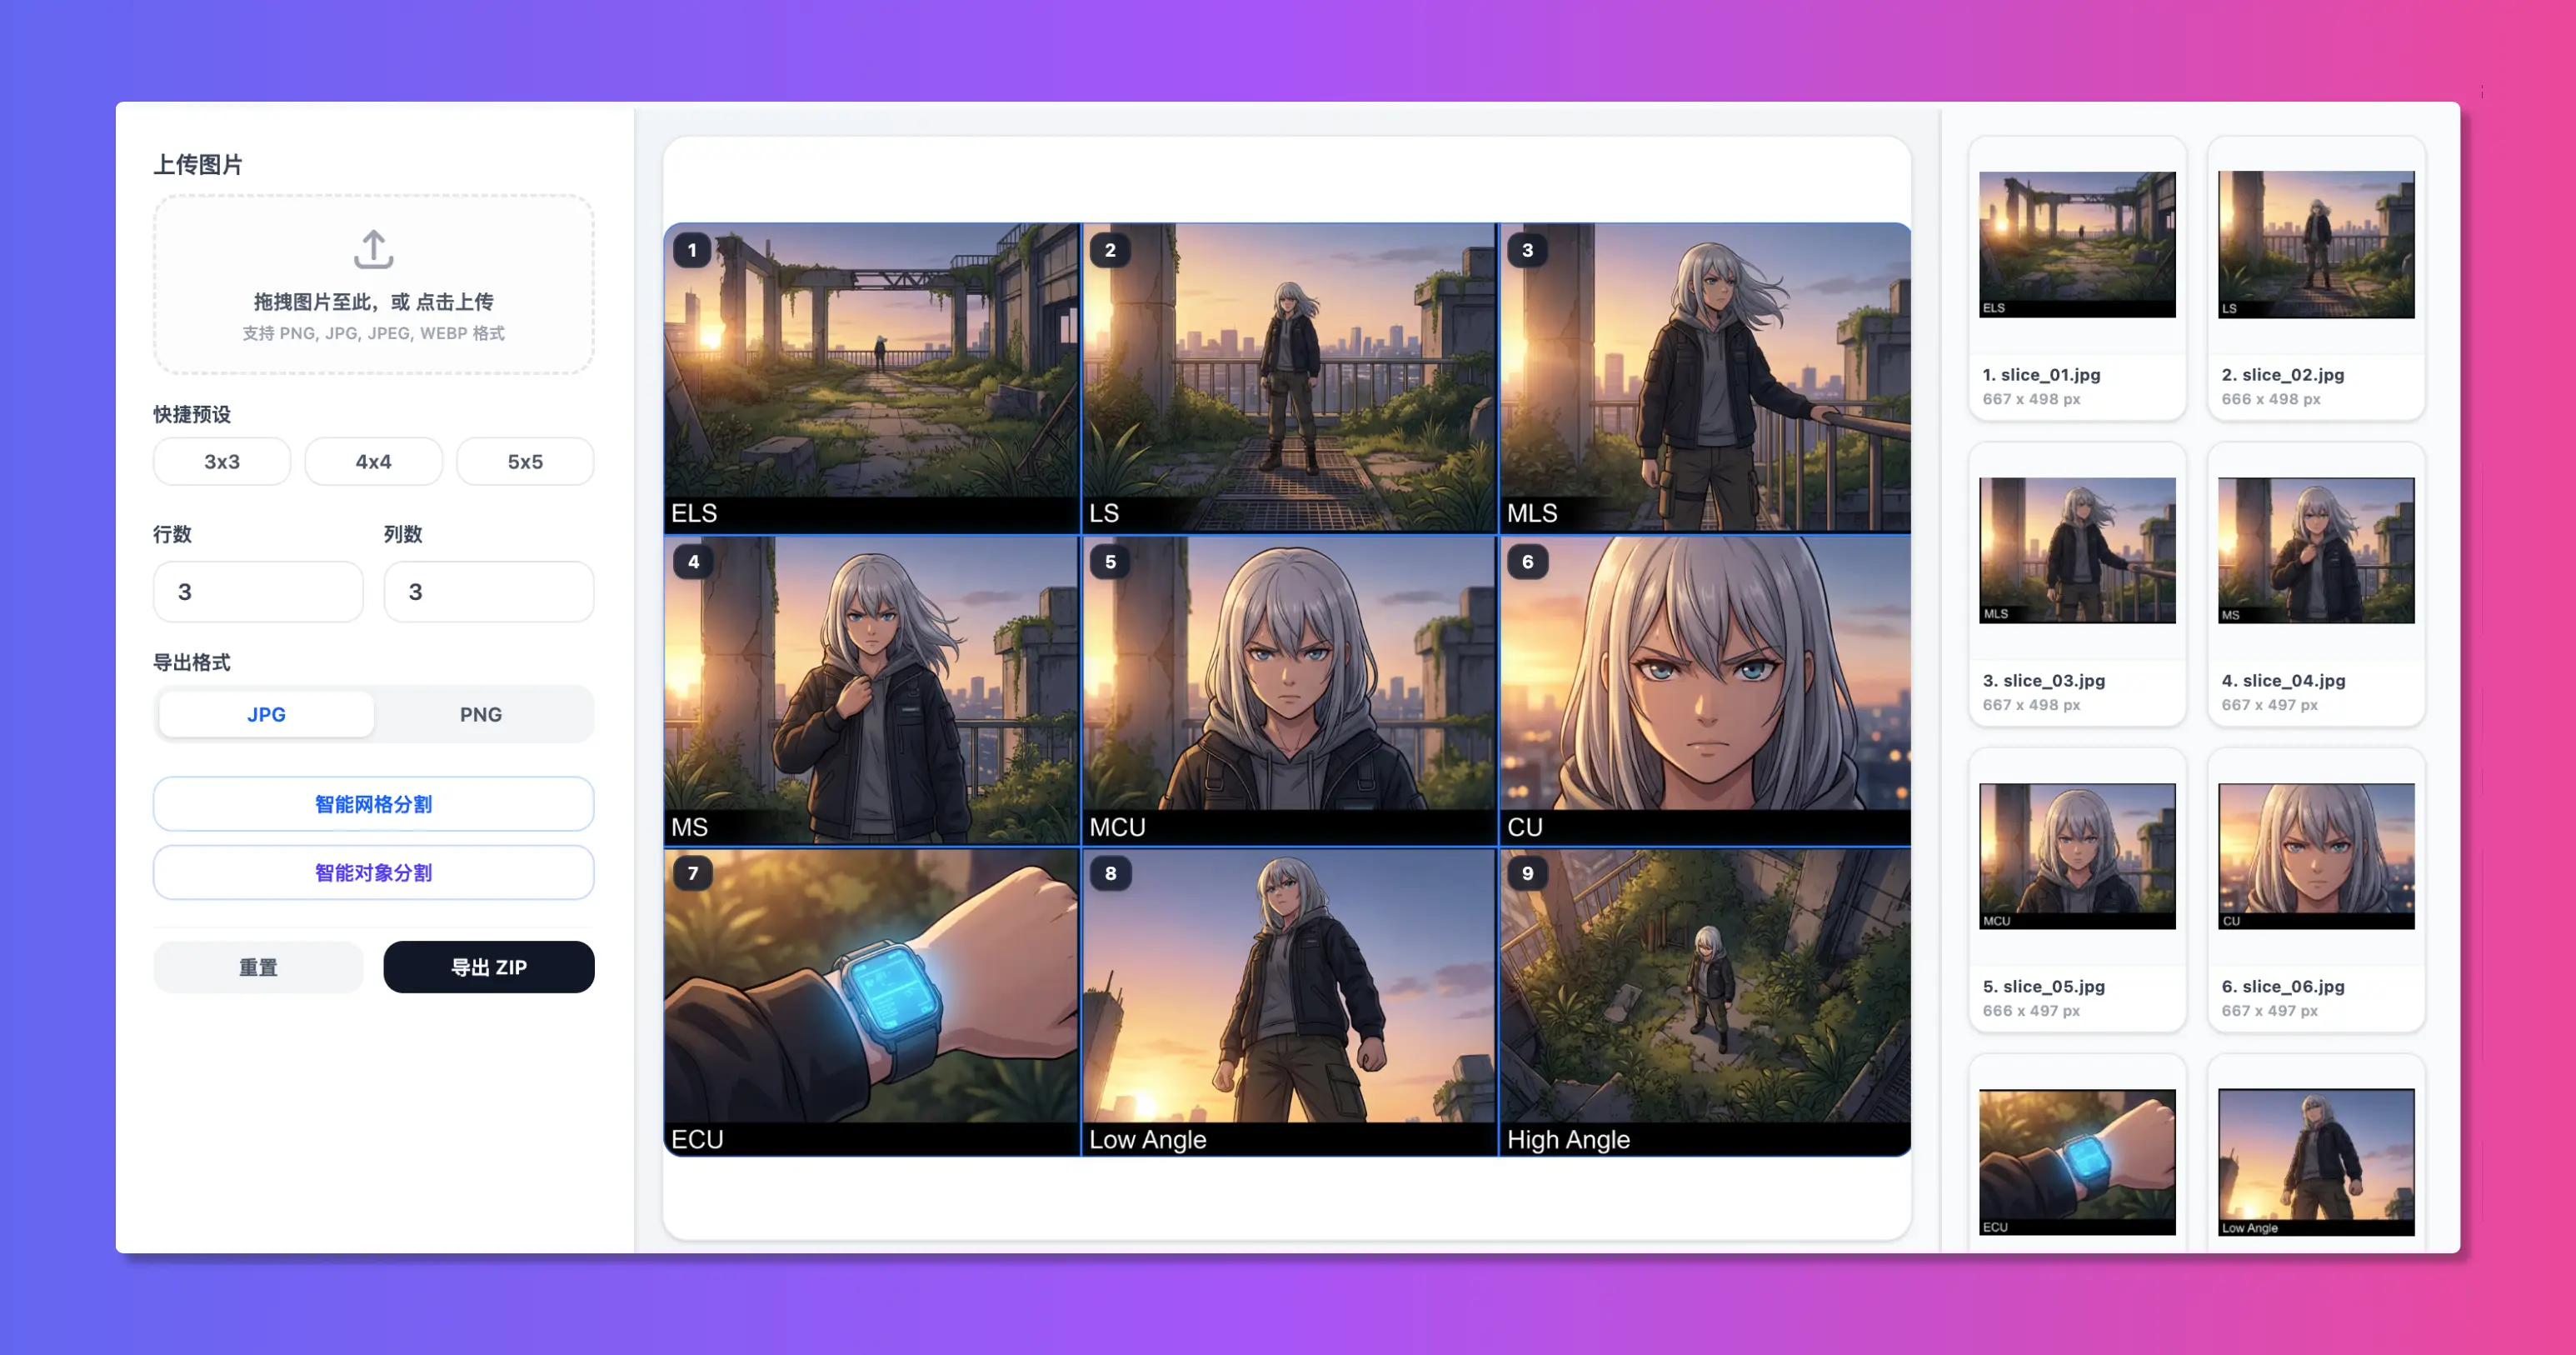
#### Step 1: Upload Your Image
Go to the Smart Slice page. Drag and drop your high-res image directly onto the canvas area, or click inside the box to choose a photo from your local files.
#### Step 2: Configure Grid Slices
1. Select Mode: The control panel defaults to "Smart Grid Slicing" (智能网格分割).
2. Set Rows and Columns: Set both columns and rows to 3 under settings. You will see red gridlines overlay your photo.
3. Manual Adjustments:
- By default, the system divides the image into equal squares.
- If your source image is wide or you want to align cuts manually, grab any red guideline with your cursor and drag it. This allows for customized asymmetric splitting.
- You can also click the "9-Grid (3x3)" preset button to instantly align the grid.
#### Step 3: Local Lossless Export
1. Quality Check: Choose PNG for lossless quality, or select JPG with a compression quality above 95%.
2. Download: Click "Export ZIP". The splitter will execute client-side algorithms via HTML5 Canvas in milliseconds and prompt you to download the finalized ZIP file.
3. Privacy First: Slicing runs 100% in your local browser sandbox. No images are sent to any remote server, meaning your private photos remain secure.
3 Common Mistakes to Avoid
- Incorrect Upload Order: Social platforms post grids from left-to-right, top-to-bottom (1 is top-left, 9 is bottom-right). Check file names like
slice_row1_col1.jpgand upload them in the exact numerical sequence, or the final assembly will be scrambled. - Mismatched Aspect Ratios: All 9 sub-images must share identical aspect ratios (e.g. all 1:1 squares). Mixing vertical and square crops will break platform alignments.
- Awkward Text Cuts: If your poster contains typography, adjust reference lines so text is complete inside single grid cells as much as possible, avoiding splitting single characters in half.
Conclusion
Seamless nine-grid slicing is a simple yet high-impact design technique for digital feeds. Using the free, client-side Smart Slice and Woolly Collage toolkits by WoollyPix, you can create eye-catching visual layouts in seconds. Choose a photo from your library and start designing today!